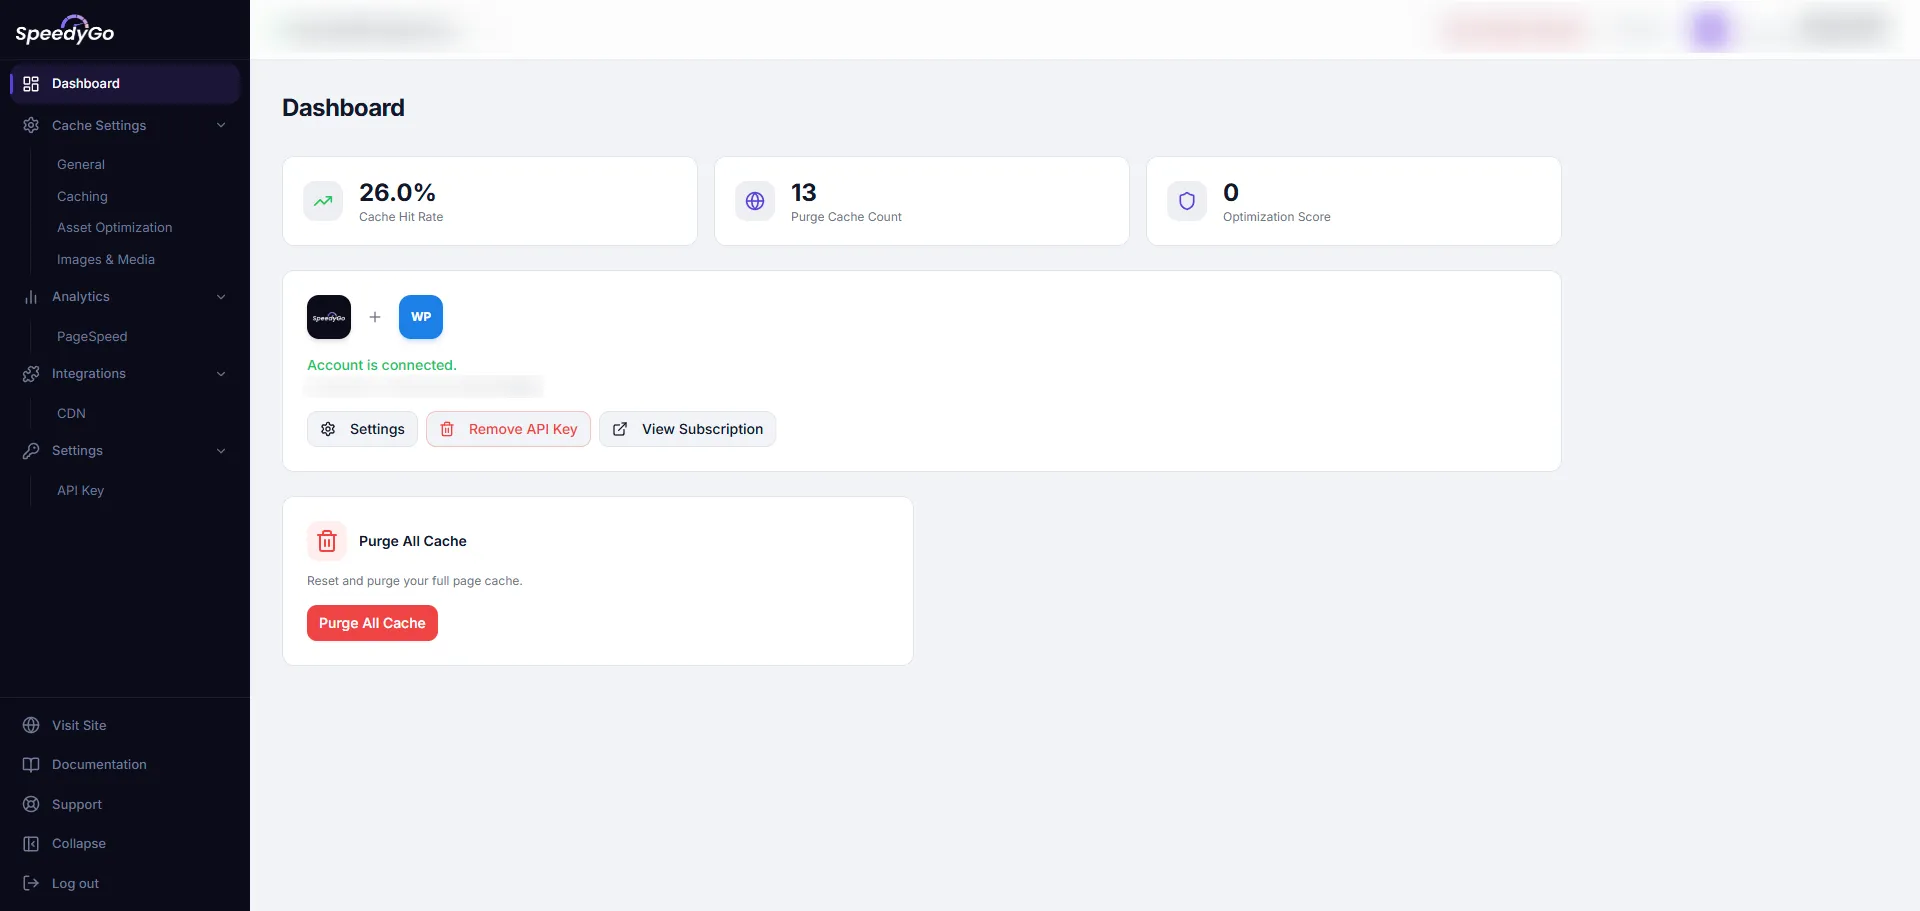
SpeedyGo is an all-in-one performance plugin for WordPress, designed to optimize every aspect of your site’s speed and efficiency. This guide will walk you through the process of installing, activating, and configuring SpeedyGo to get your website running at lightning speed.
Prerequisites #
Before installing SpeedyGo, ensure that you have:
- WordPress version 5.0 or higher.
- PHP version 7.2 or higher.
- Administrator access to your WordPress dashboard.
Note: If you are using another caching plugin, SpeedyGo will automatically detect it and notify you to prevent conflicts. It is recommended to deactivate other caching plugins before activating SpeedyGo.
Step 1: Install the Plugin #
There are two ways to install SpeedyGo: via the WordPress Plugin Directory or by uploading the plugin .zip file manually.
Option A: Uploading the Plugin Zip File (Pro/Custom Download) #
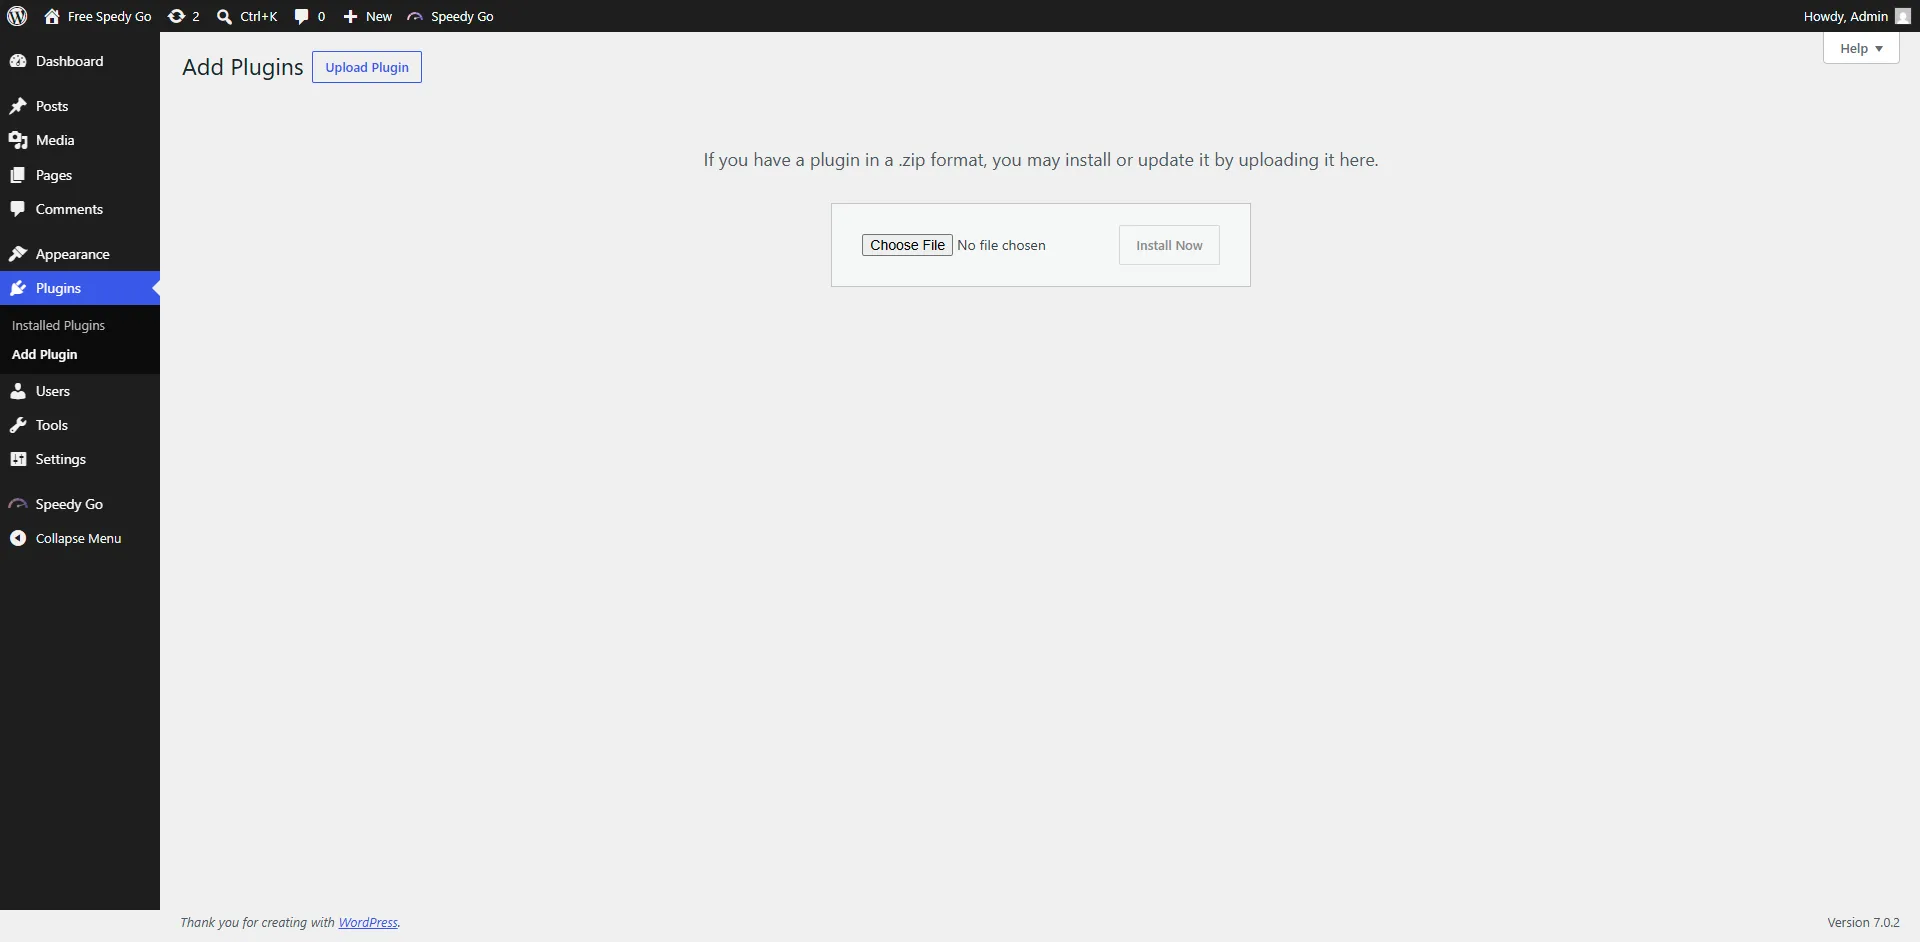
- Log in to your WordPress Admin Dashboard.
- Navigate to Plugins → Add New Plugin in the left-hand menu.
- Click on the Upload Plugin button at the top of the screen.
- Click Choose File and select the
speedy-go.zipfile you downloaded. - Click Install Now.
Option B: Installing from the Plugin Directory #
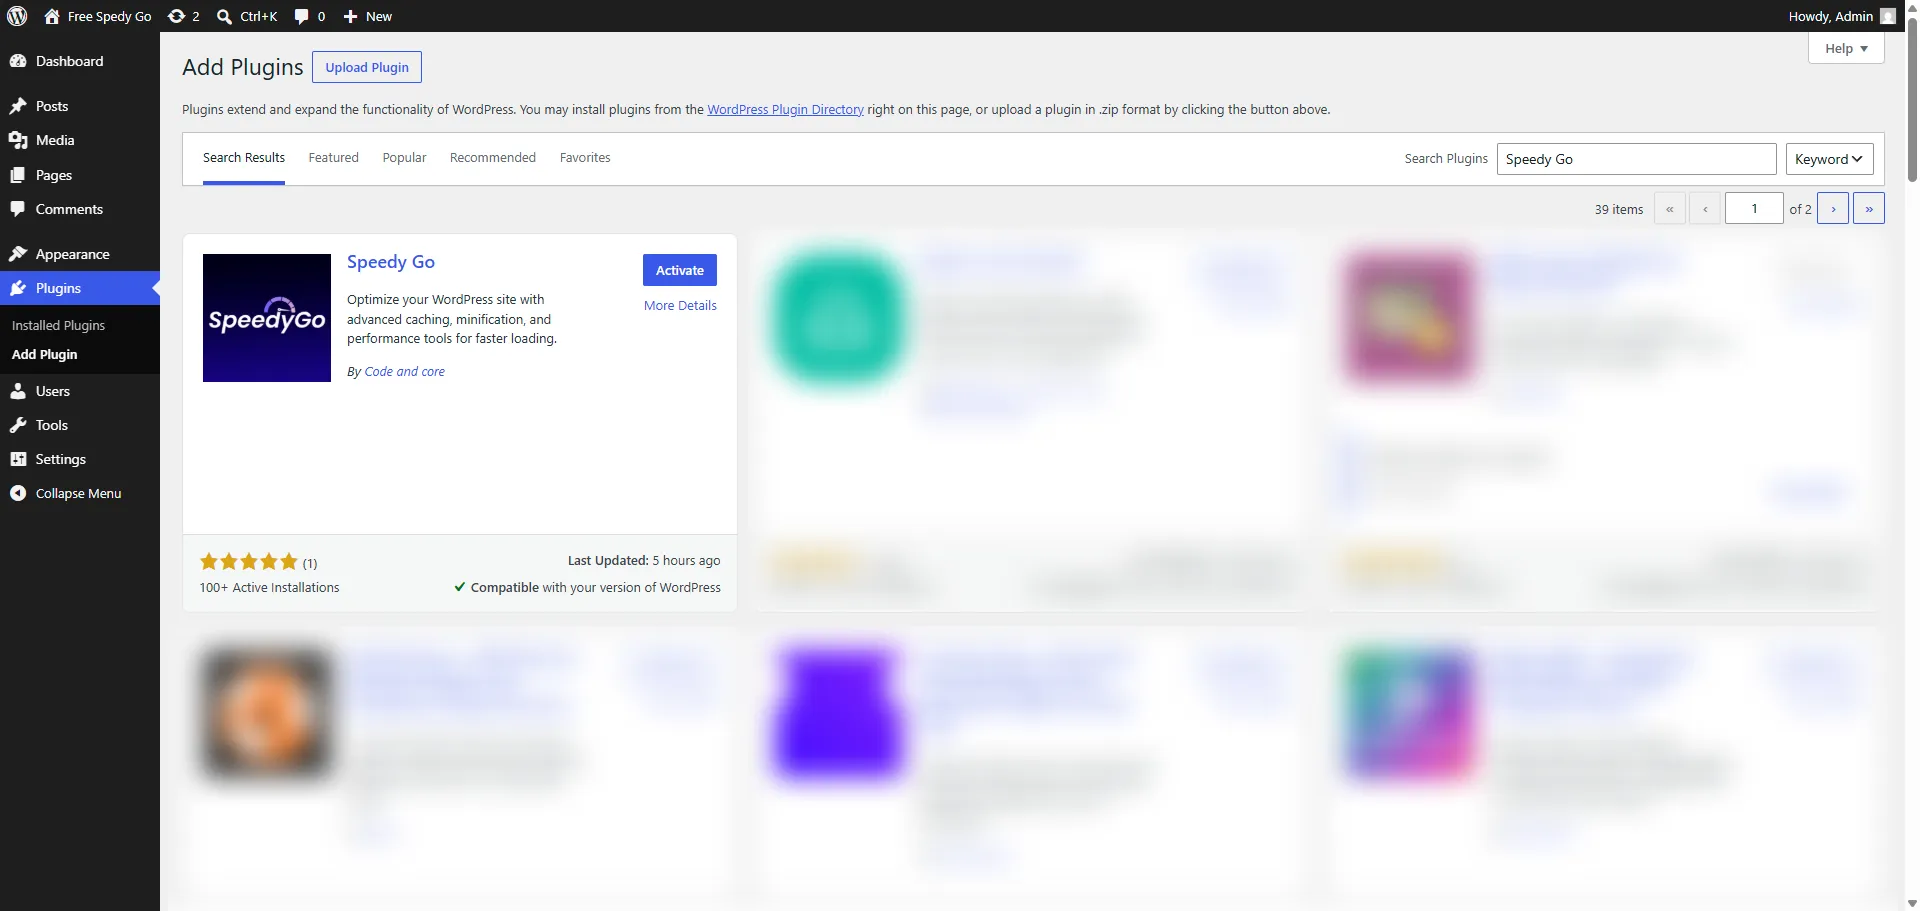
- Go to Plugins → Add New Plugin.
- Type SpeedyGo in the search bar.
- Find the plugin (by codeandcore) and click Install Now.
Step 2: Activate the Plugin #
Once the installation is complete, click the Activate button to enable SpeedyGo on your website.
Tip: After activation, SpeedyGo will add a new menu item called SpeedyGo to your WordPress admin sidebar and an optimization icon to your admin bar at the top of the screen.
Step 3: Connect Your SpeedyGo Account #
To unlock the full potential of SpeedyGo and synchronize your optimization settings, you need to connect your website to your SpeedyGo account.
Method A: Automatic Connection (Recommended) #
This is the fastest way to get started.
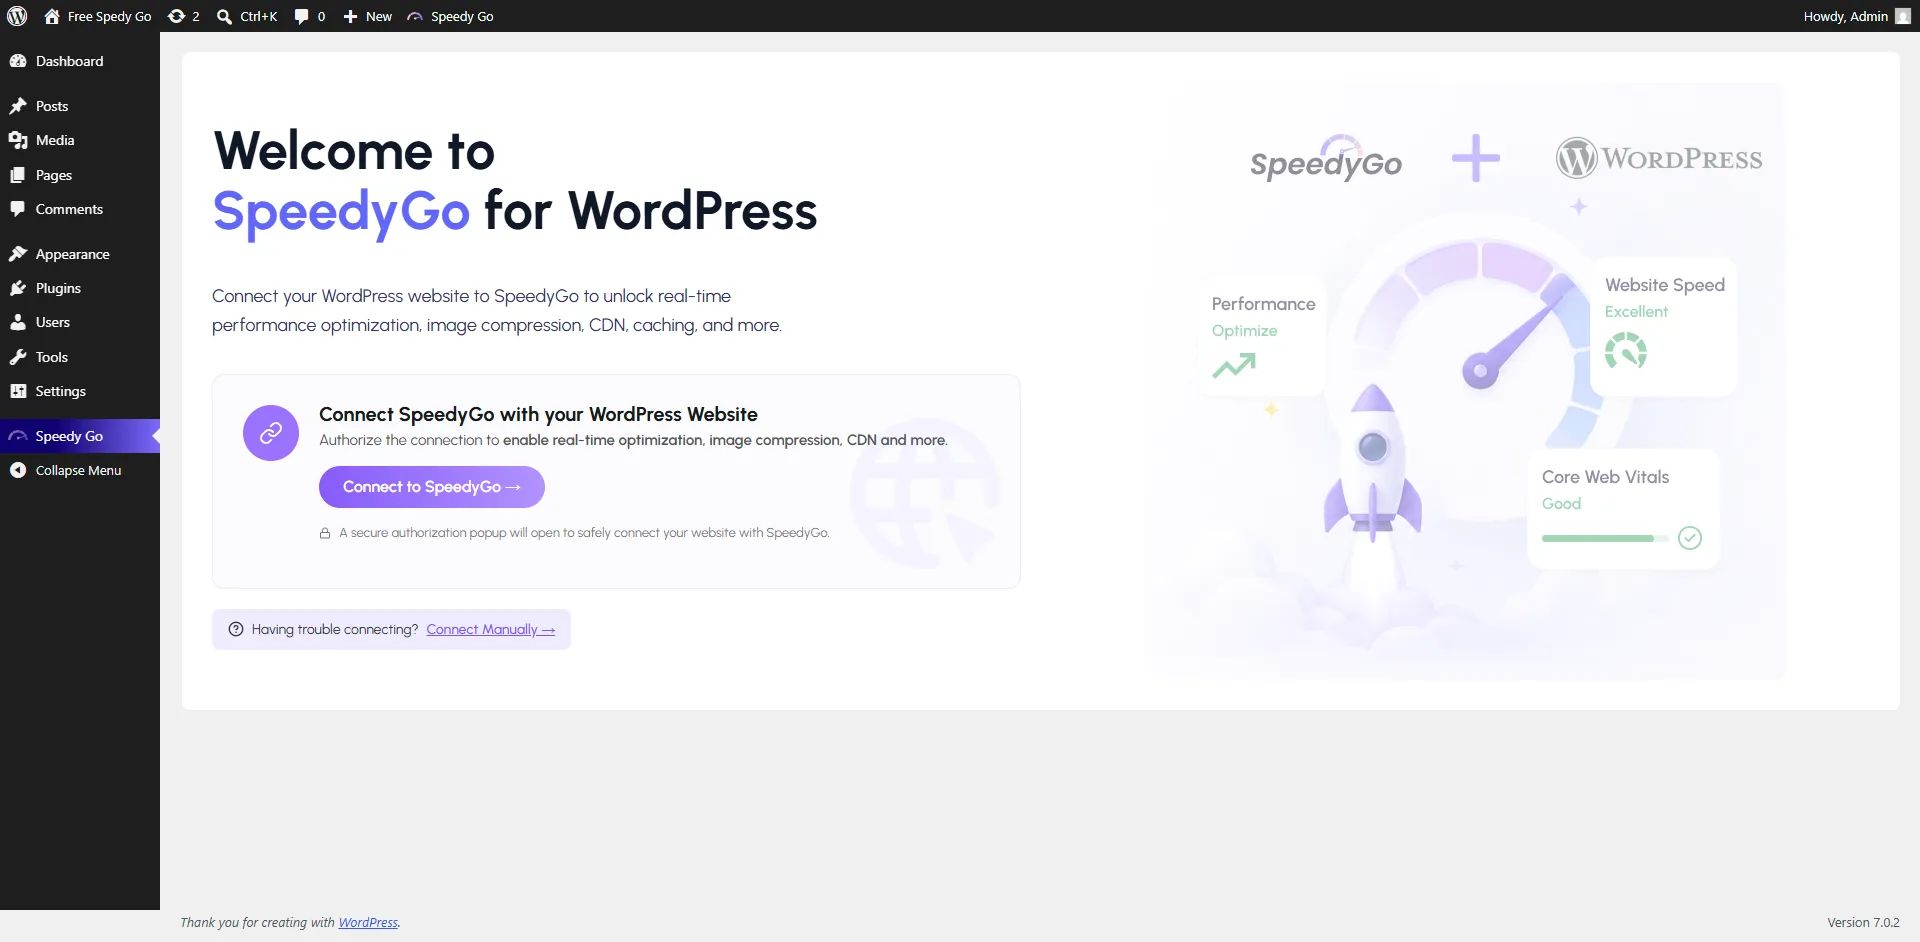
- Navigate to the newly added SpeedyGo menu in your WordPress sidebar.
- You will be greeted by the Plugin Connection Screen.
- Click the large Connect to SpeedyGo button.
- A secure popup window will open, directing you to
speedygo.io. - Log In or Sign Up: If you already have an account, log in. If not, create a new account to get started.
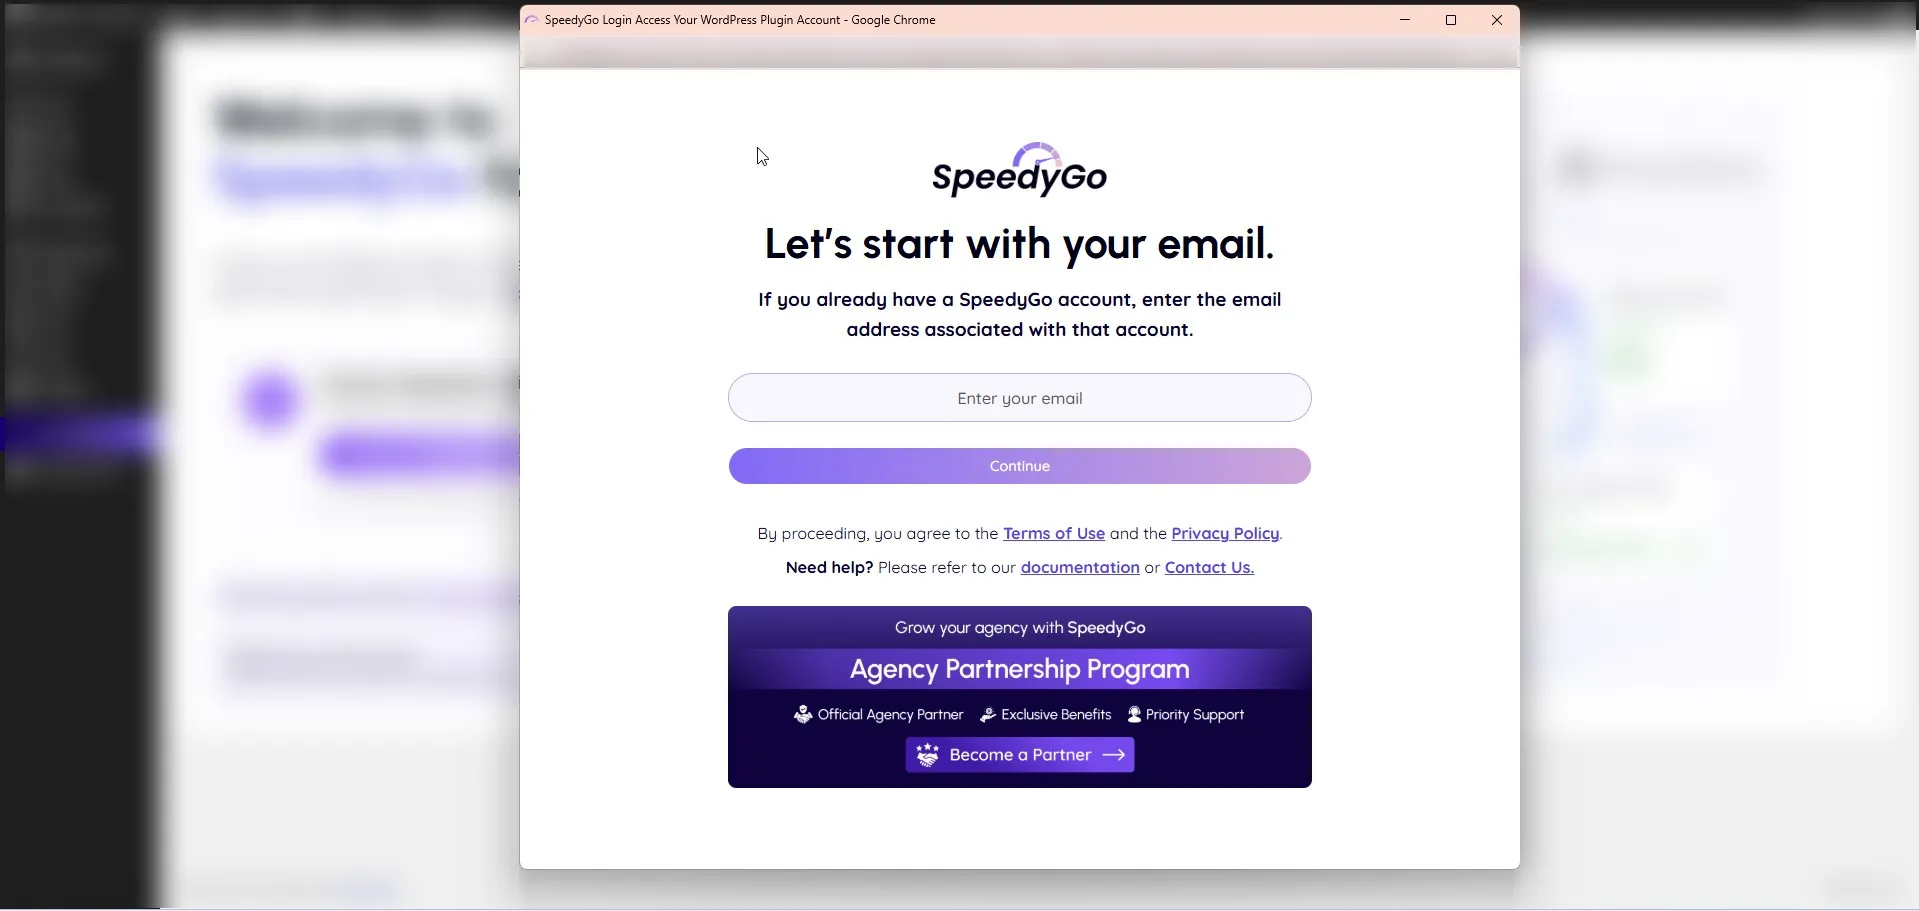
- Select Your Plan: Once logged in, you will be prompted to select a subscription plan (Free or Pro) for this specific website.
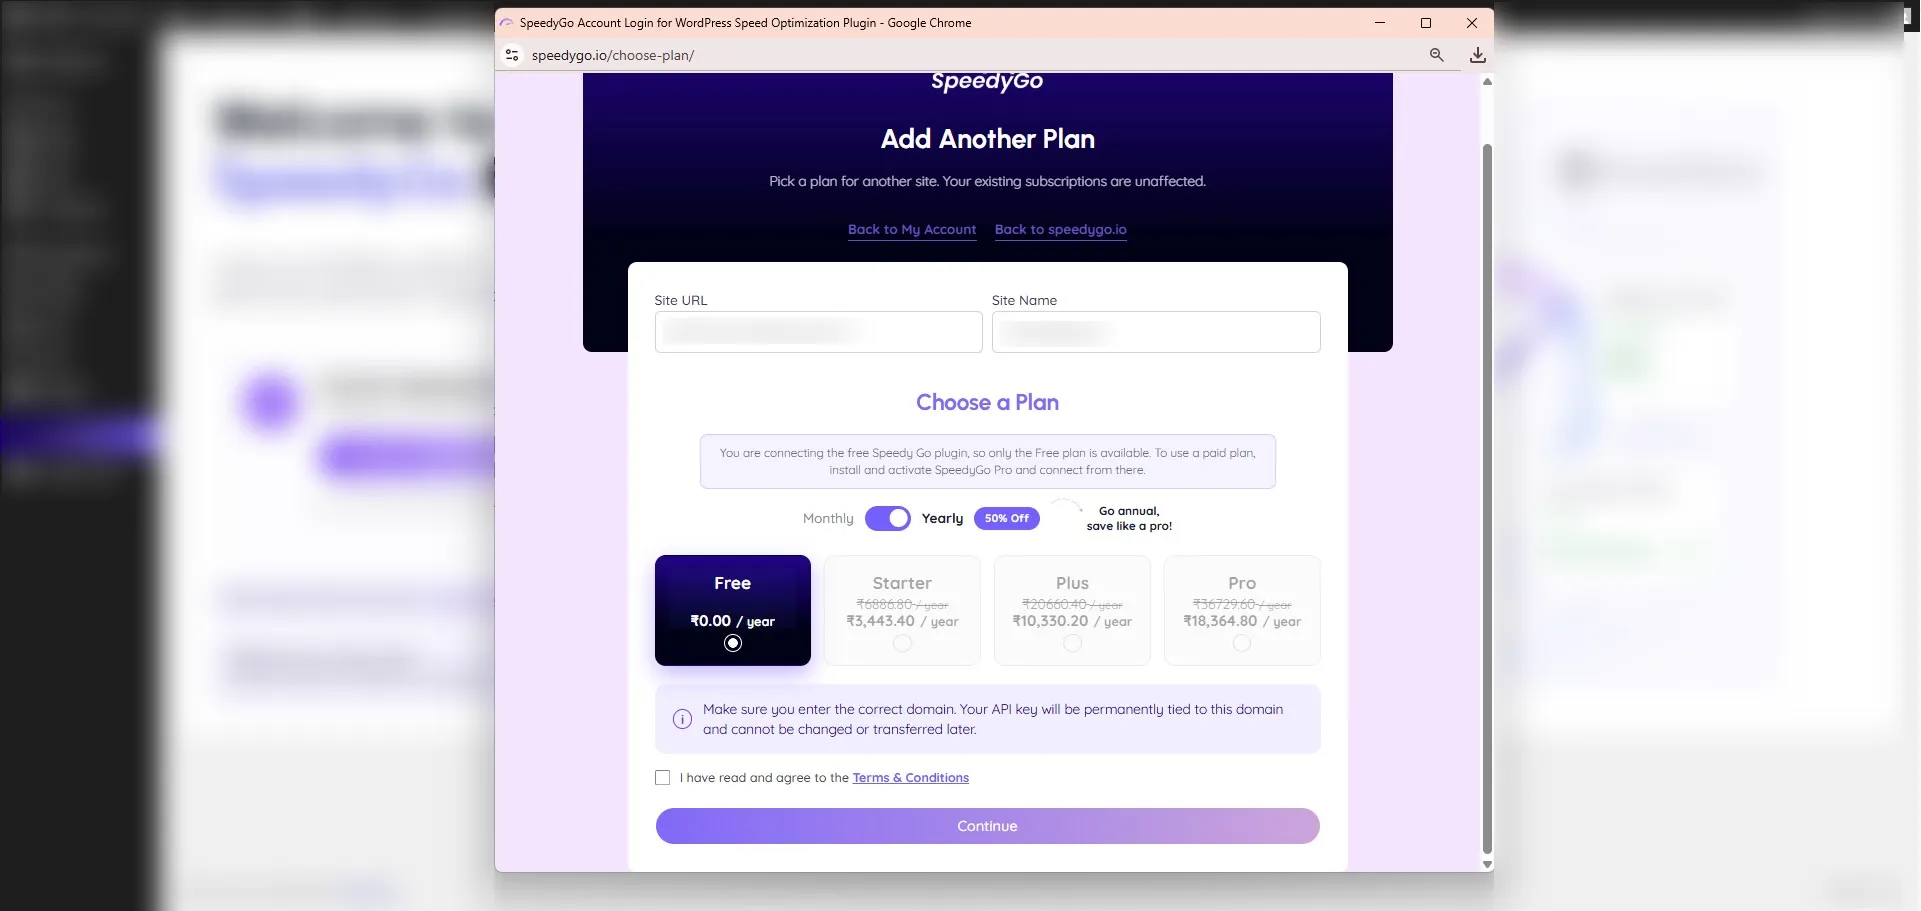
- Authorize Connection: Click the button to approve the connection.
- The popup will automatically close, and your WordPress dashboard will refresh to show that your site is now successfully connected!
Method B: Manual Connection Fallback #
If you encounter issues connecting automatically (for example, if your server is behind a strict firewall), you can establish the connection manually.
- Log in to your account at speedygo.io.
- Go to your dashboard and locate your API Key / License Key. Copy this key.
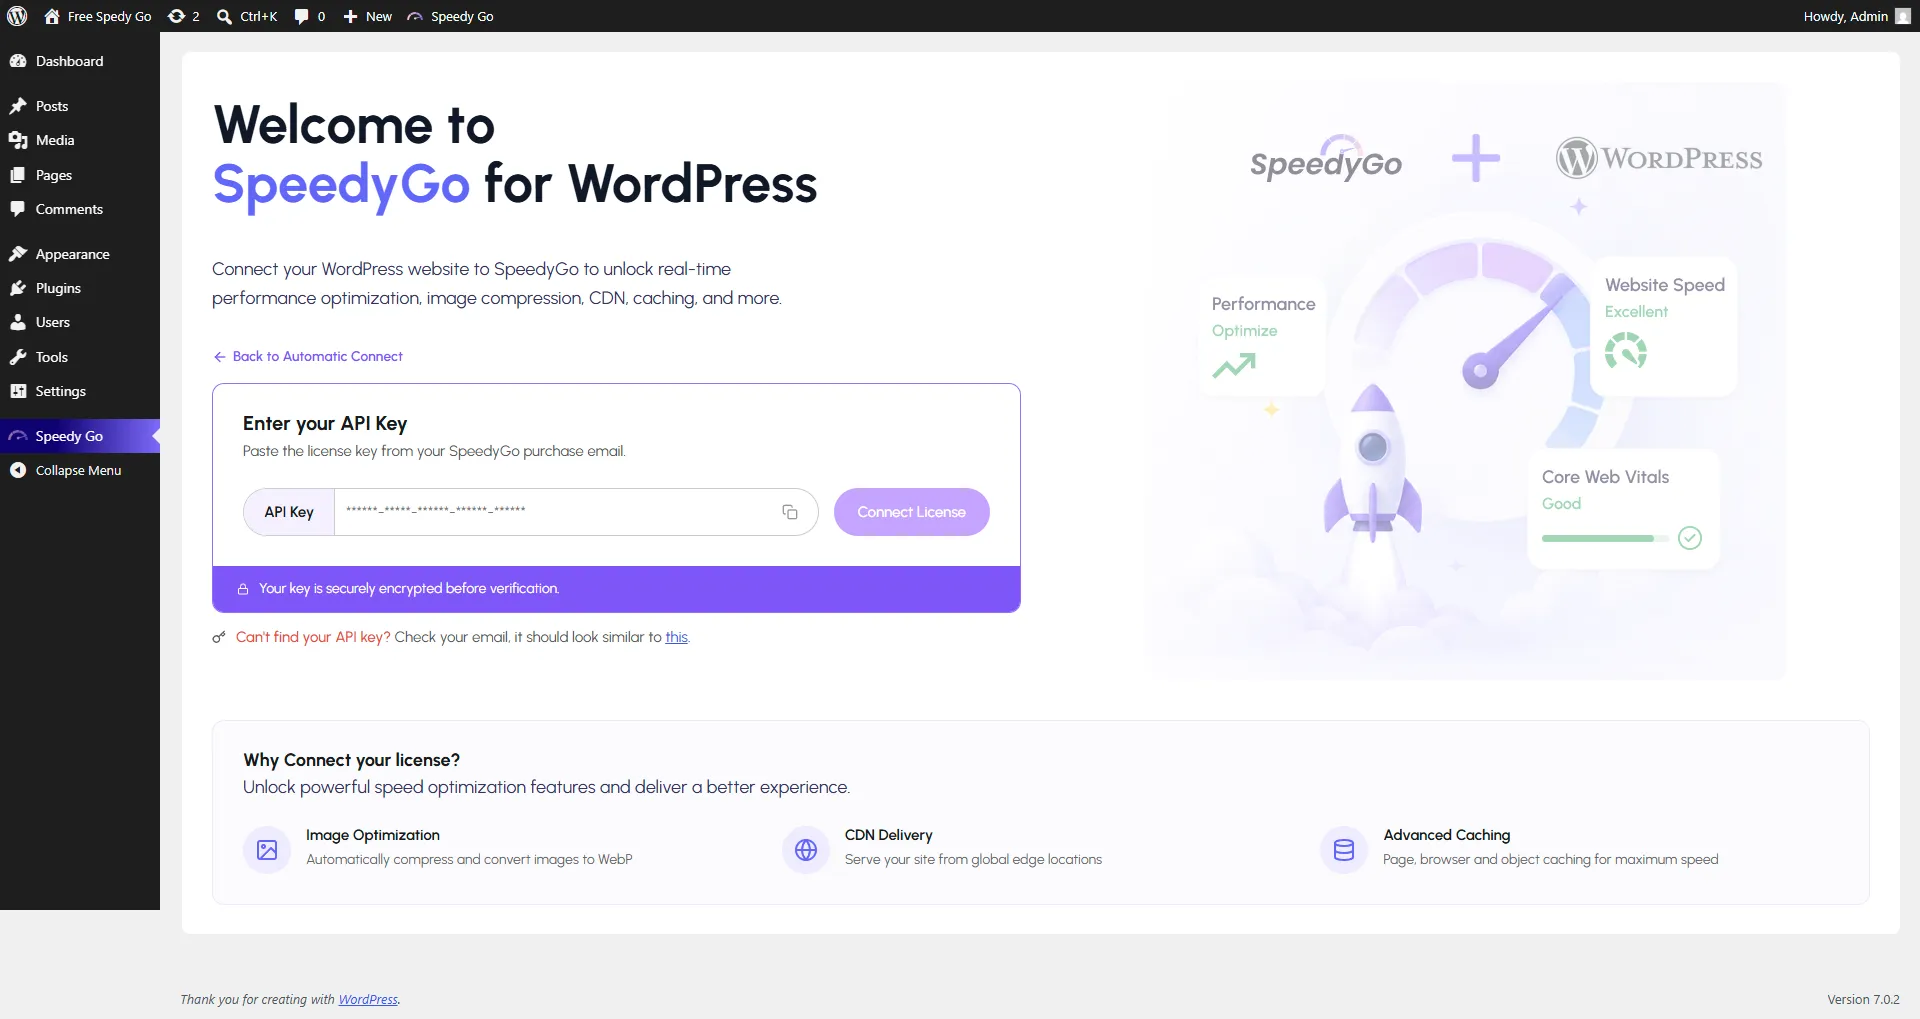
- Back in your WordPress dashboard, go to the SpeedyGo connection screen.
- Click the link for the Manual Connection Fallback located near the main connect button.
- Paste your copied API Key into the provided field.
- Click Save & Connect. Your site will now be securely linked.
Step 4: Configure Optimization Settings #
SpeedyGo is designed to make performance optimization effortless. You can choose to configure settings manually or use our built-in quick presets.
Using Quick Optimization Presets #
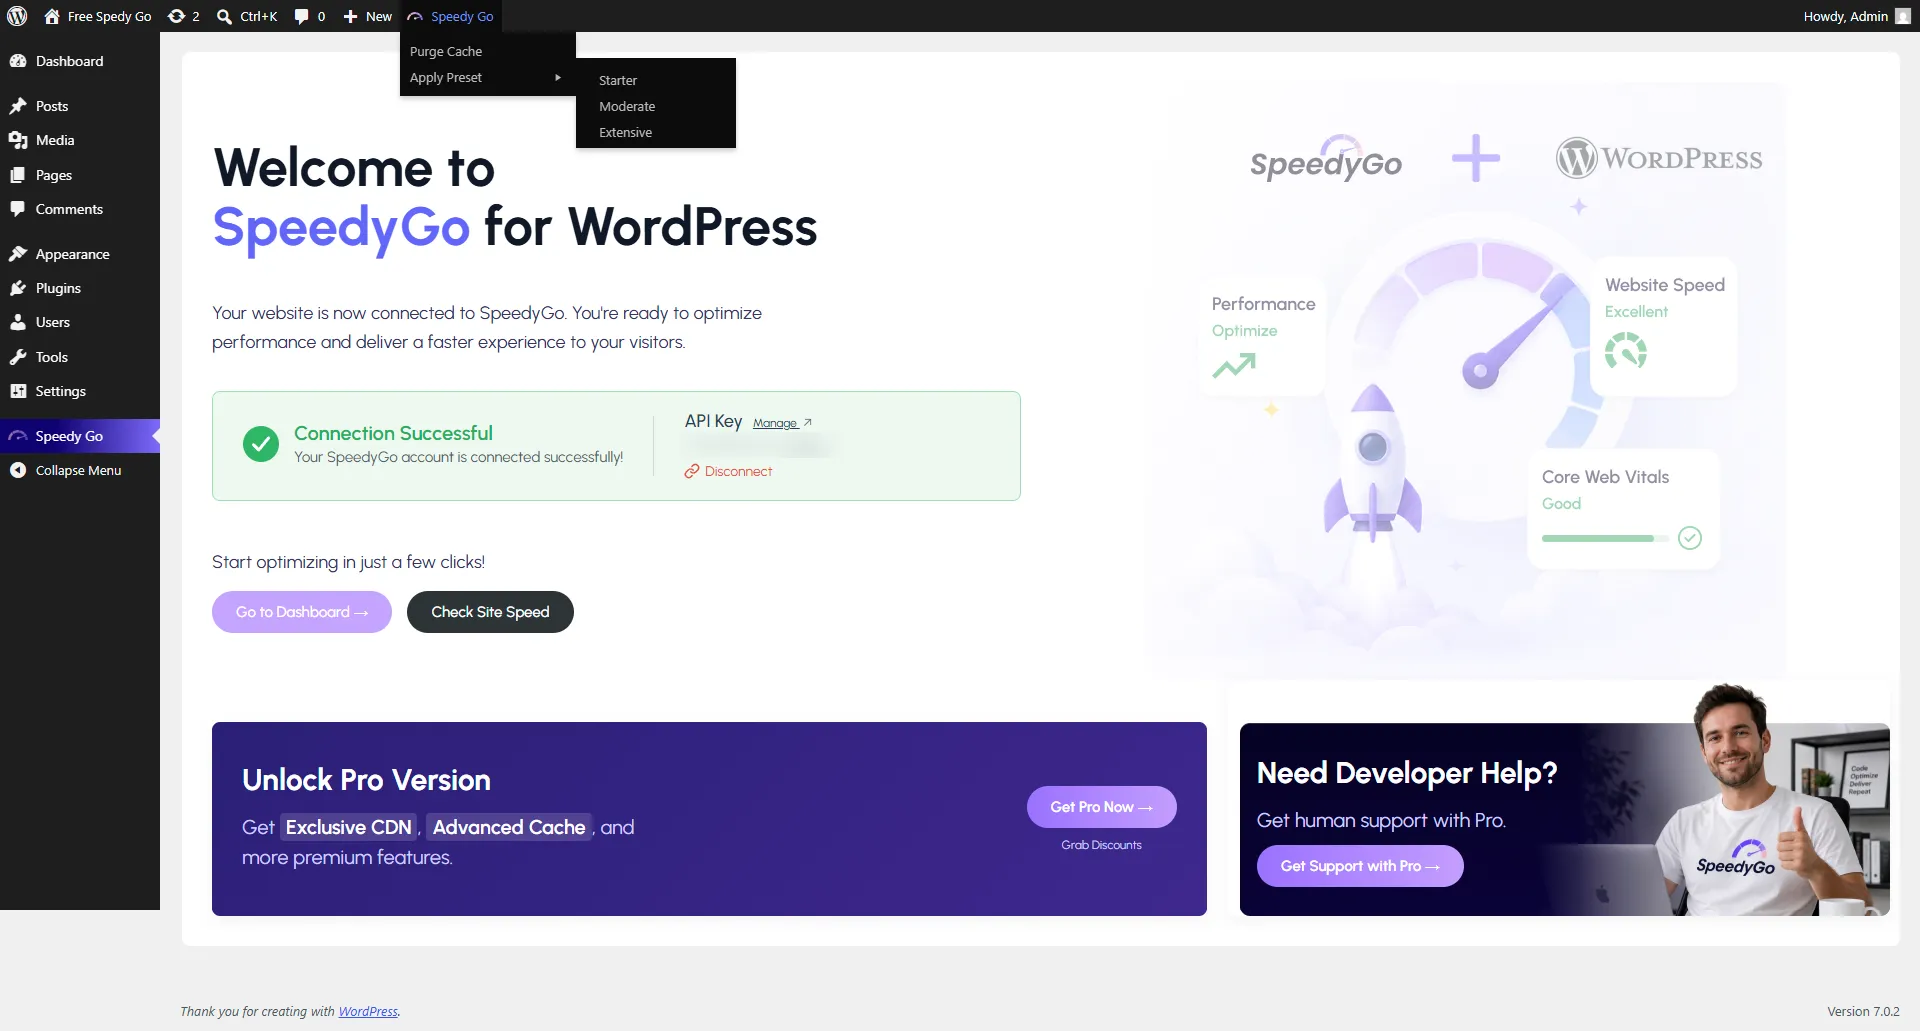
You can instantly apply recommended settings directly from the WordPress admin bar:
- Hover over the SpeedyGo item in the top admin bar.
- Choose an optimization preset: Starter, Moderate, or Extensive.
- SpeedyGo will instantly configure your settings, purge the cache, and display a live progress timeline!
Step 5: Verify Your Setup #
Once connected and configured, SpeedyGo will immediately start optimizing your pages.
- Visit your website in a private/incognito window to experience the new, faster load times.
- You can use the Admin Dashboard Widget to monitor cache status, performance improvements, and WebP savings directly from your WordPress dashboard.