
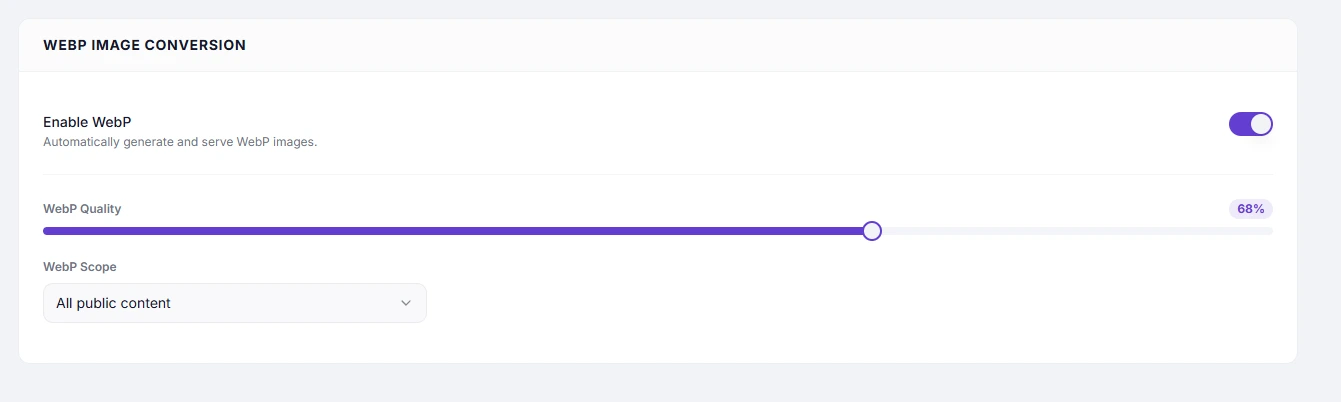
Conversion Scope Rules control which pages on your site have their images converted to WebP format. You can apply WebP conversion to the entire site, or restrict it to specific pages and post types.
Dashboard path: Cache Settings → Images & Media
Section: WebP Conversion (visible when Enable WebP is ON)
Settings #
| Setting | Type | Description |
|---|---|---|
| WebP Scope | Select | Controls which content gets WebP conversion applied. |
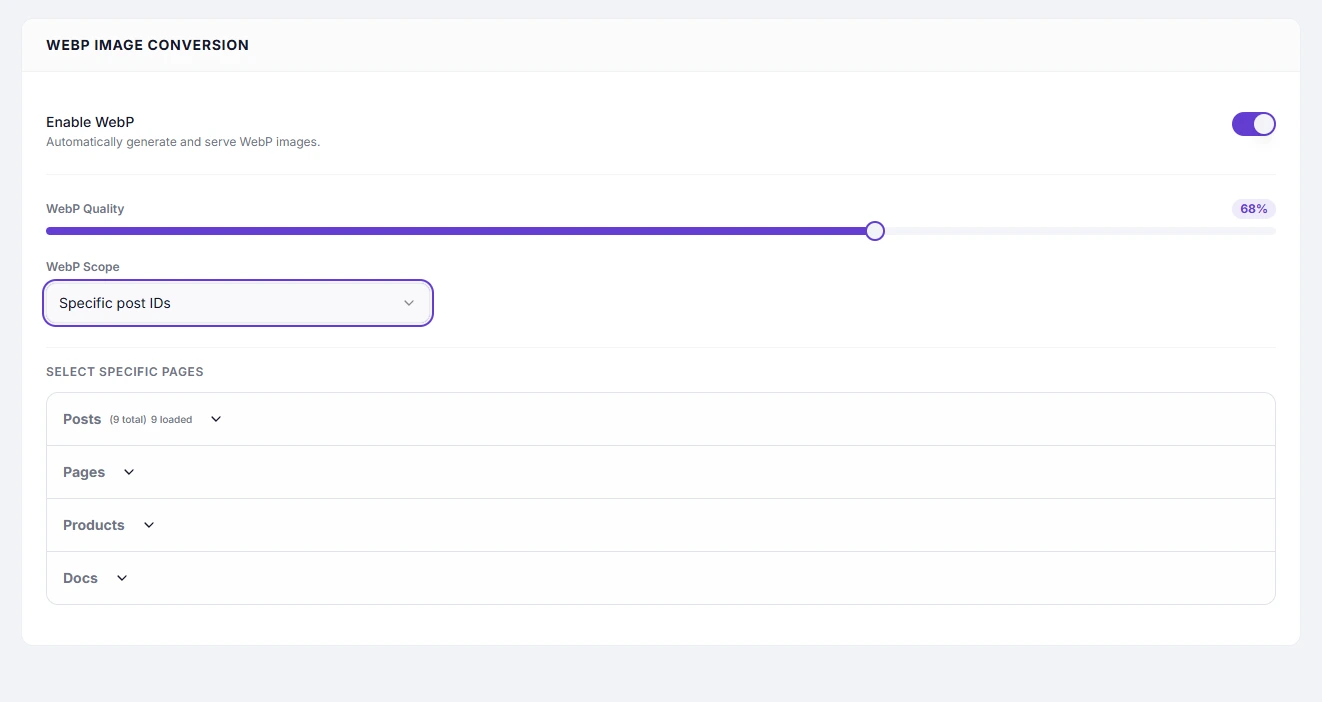
| Select Specific Pages | Accordion | Visible when scope is Specific post IDs. Browse, search, and select individual pages per post type. |
Scope Options #
All Public Content #
Converts images across every public page and post on the site. This is the simplest and most comprehensive option.
Use when: You want WebP on the entire site and have no pages that require the original image format.
Specific Post IDs #
Converts images only on pages you explicitly select. All other pages continue to serve the original image format.
Use when:
- You want to start with key landing pages or product pages before rolling out site-wide
- Certain pages must serve original image formats (e.g. pages with image downloads, or clients requiring a specific format)
- You want to reduce server processing load by limiting conversion to high-traffic pages only
How to Set Scope to All Public Content #
- Go to Cache Settings → Images & Media.
- Ensure Enable WebP is ON.
- Under WebP Scope, select All public content.
- Click Save Changes.
How to Select Specific Pages #
- Set WebP Scope to Specific post IDs.
- An accordion list appears showing your post types (Posts, Pages, Products, etc.).
- Click a post type to expand it.
- Use the search box to find a specific page by title.
- Tick the checkbox for each page to include.
- Repeat for other post types as needed.
- Click Save Changes.
How the Accordion Selection Works #
| Action | Effect |
|---|---|
| Expand a post type accordion | That post type is added to the selection set |
| Tick a checkbox inside an expanded accordion | That individual page is included in WebP conversion |
| Untick a checkbox | That page is removed from conversion |
| Close (collapse) an accordion | All selections for that post type are removed |
Important: Closing an accordion removes all selections for that post type. Keep accordions open for all post types whose pages you want to keep selected. Only click Save Changes while all required accordions are still open.
Searching Within a Post Type #
- Expand the accordion for the post type.
- Type in the search box and press Enter.
- The list filters to matching pages.
- Tick the pages you want.
- Clear the search to return to the full list.
Results load 20 items at a time. Click Load More if your page is not in the initial list.
Troubleshooting #
| Symptom | Likely cause | Fix |
|---|---|---|
| Specific pages not getting WebP | Page not selected in the accordion | Re-open the accordion, search for the page, tick it, and save |
| Previously selected pages lost | Accordion was closed before saving | Re-select the pages and save with accordions open |
| “No pages found” in accordion | Post type has no published content | Publish at least one post/page of that type |
| Want to switch from specific to all-site | Change scope dropdown | Select All public content and save; specific selections are cleared |
Tips #
Tip: Start with All public content for simplicity. Switch to Specific post IDs only if you have pages that specifically should not use WebP.
Tip: If you manage a large WooCommerce store, use Specific post IDs to apply WebP to your highest-traffic product pages first, monitor results, then expand to all products.


